If your ProDVR is bricked after firmware update
process, you can easily restore it by flashing firmware directly to the serial
flash ship.
What you will need:
- Arduino Mini Pro atmega328 board. (16Mhz 5V,
about 1.30$)
It is also possible to
use Arduino Nano with atmega328 (16Mhz)
- USB to Serial adapter. It can be FTDI,
CH340G (just look for ones that
support 3.3V , about 1.30$)
- Thin
wires for connecting Arduino and Serial Flash
Next parts are needed if Arduino outputs
more than 3.3V on signal pins:
- Resistors
for level divider 5k and 10k both (2 pcs of each value)
- Breadboard
(not necessary, but very convenient)
Software
Steps
Flashing
Serprog firmware to Arduino Mini Pro:
1. Connect USB – TTL converter to Arduino Mini Pro board
2. If everything is ok, You should see “FTDI” or “USB-SERIAL CH340” device
in device manager
3. Connect Arduino Mini Pro to USB-TTL adapter (check that your FTDI or USB
Serial adapter uses 3v for powering)
4. Start Xloader, open [fser-duino.hex] file, set the right com port and
hit “Upload”.
Now
You have Flashrom compatible programmer.
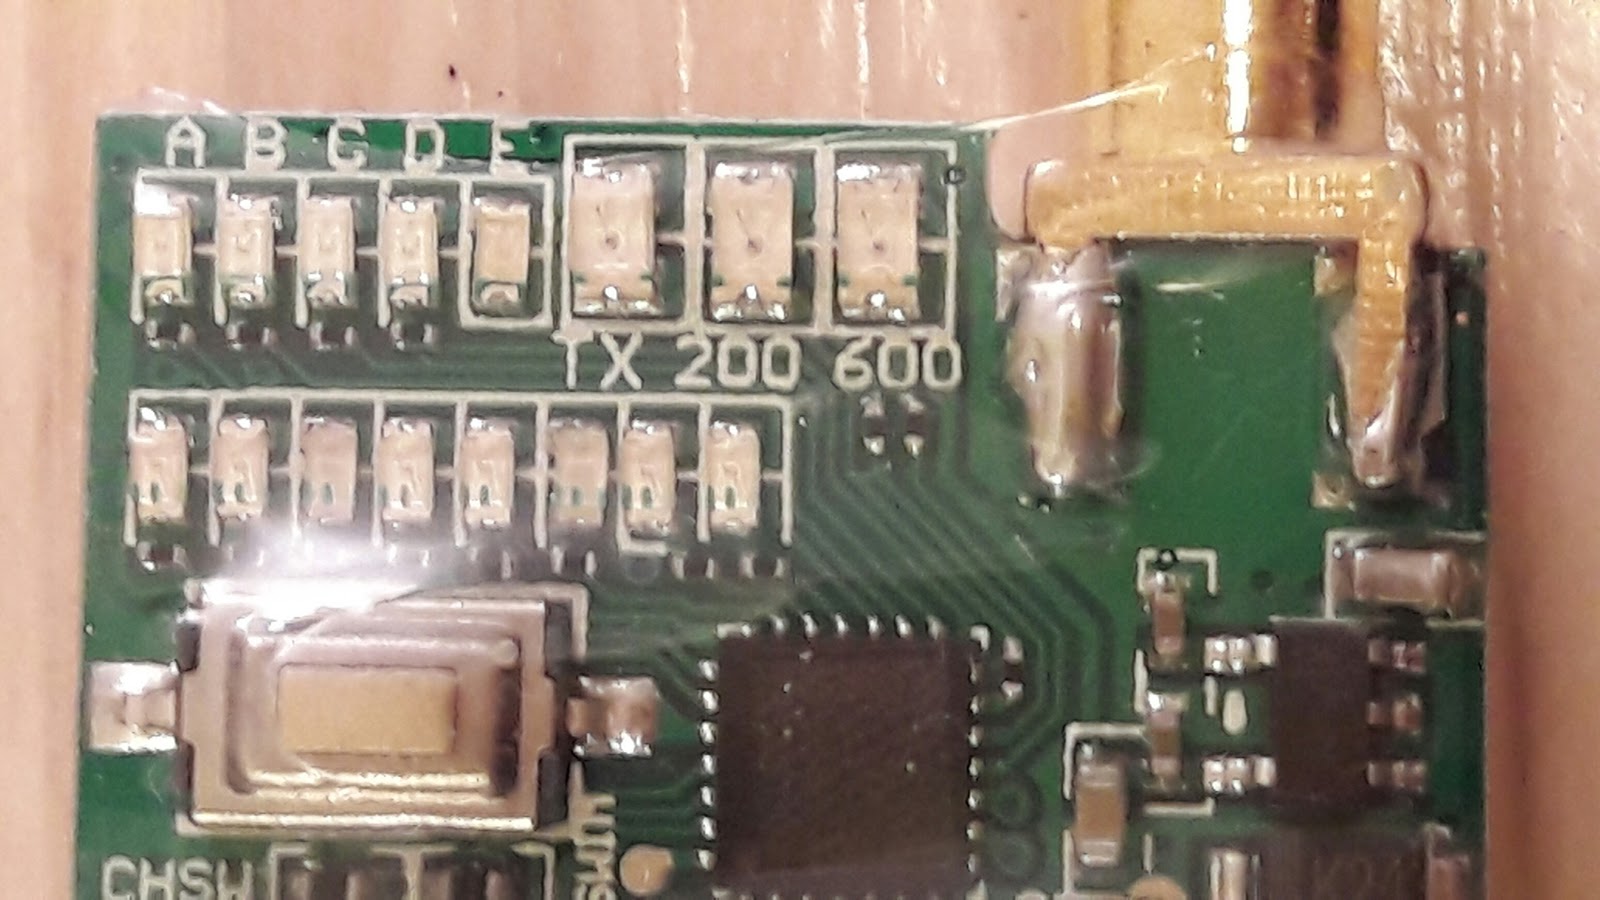
5. Connect ProDVR flash IC to the Arduino. Use supplied connection
schematics. For this you need to lift a bit VCC pin of the serial flash to
disconnect from the rest of the board electronics and solder 5 wires: VCC, GND,
CS, CLK MOSI and MISO. Try to keep them as short as possible,
about 10cm. Use small diameter wire.
Connection
table:
FLASH
CHIP - ARDUINO
VCC
(pin 8 ) to Arduino 3.3V output (5V
would likely kill the chip, be carefull)
GND
(pin 4) to Arduino GND pin
CS
(pin 1) to Arduino pin 10
DO
(pin 2) to Arduino pin 12
DI
(pin 5) to Arduino pin 11
Clock
(pin 6) to Arduino pin 13
Schematics
(only if Arduino outputs 3.3V signal levels):
6. Once connected, try reading the contents of flash IC
by running this command:
mingw32-w64-flashrom-r1781.exe --programmer serprog:dev=COM10:115200 -c MX25L1605
--read test.hex
You should get similar output to this:
E:\My\RC\Flashrom>mingw32-w64-flashrom-r1781.exe --programmer serprog:dev=COM10:115200
-c MX25L1605 --read test.hex
flashrom v0.9.7-r1781 on Windows 6.2 (x86)
flashrom is free software, get the source code at http://www.flashrom.org
Calibrating delay loop... OK.
serprog: Programmer name is "frser-duino"
Found Macronix flash chip "MX25L1605" (2048 kB, SPI) on serprog.
Reading flash... done.
7. If everything goes OK by this far, you are ready to
flash the firmware. To flash the device, start this command:
mingw32-w64-flashrom-r1781.exe --programmer serprog:dev=COM16:115200 -c MX25L1605
--write flash.hex
You should get similar output to this:
E:\My\RC\Flashrom>mingw32-w64-flashrom-r1781.exe --programmer serprog:dev=COM16:115200
-c MX25L1605 --write flash.hex
flashrom v0.9.7-r1781 on Windows 6.2 (x86)
flashrom is free software, get the source code at http://www.flashrom.org
Calibrating delay loop... OK.
serprog: Programmer name is "frser-duino"
Found Macronix flash chip "MX25L1605" (2048 kB, SPI) on serprog.
Reading old flash chip contents... done.
Erasing and writing flash chip...
Erase/write done.
Verifying flash... VERIFIED.
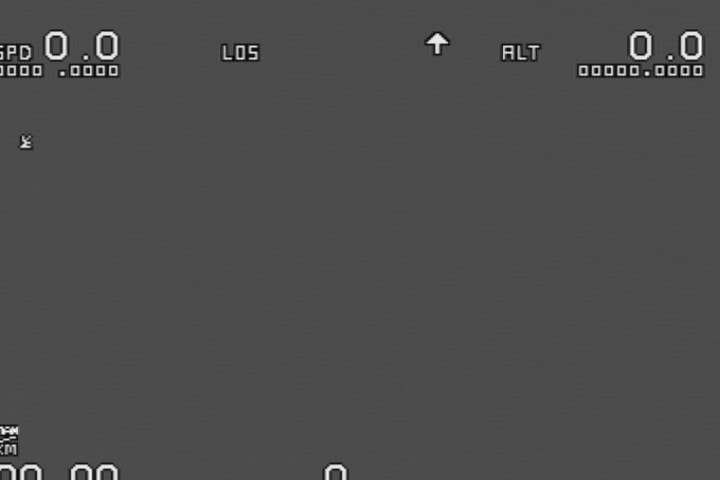
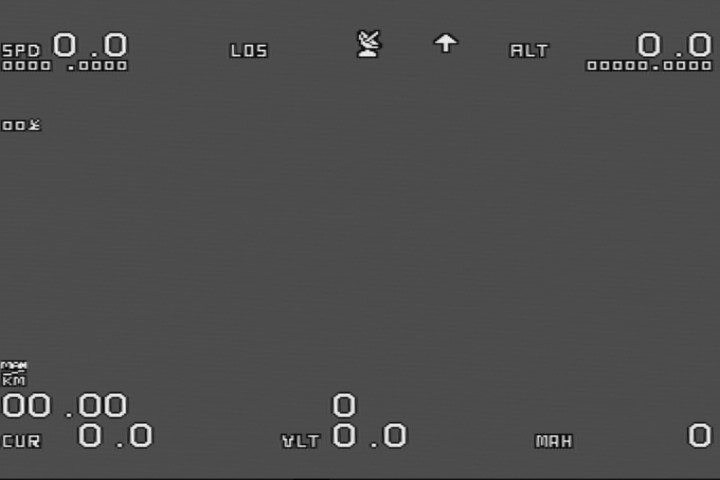
You are done! Now reconnect serial flash chip Power
pin to the PCB and try to power your ProDVR. You should see something similar
to this:
Insert SD card and you good to go!
If you have questions or you need more details, then write a comment.